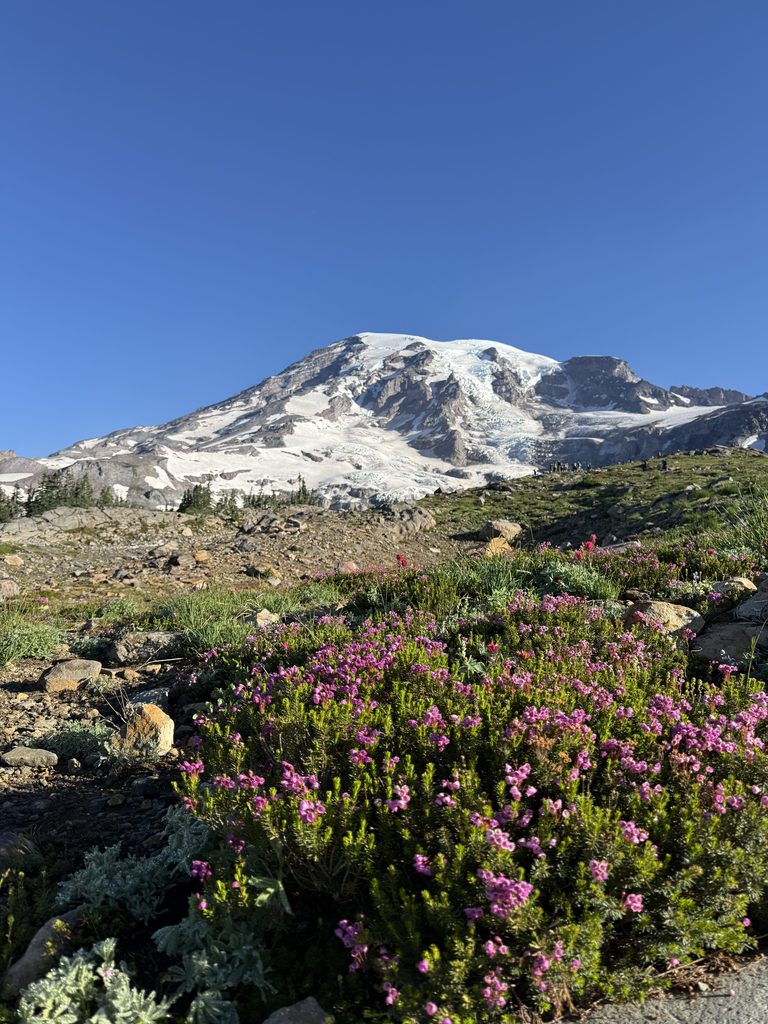
Planning a 4-day weekend trip to Mount Rainier National Park? Whether you’re booking a stay at the historic Paradise Inn, hiking the famous Skyline Trail loop, or attempting a day hike to Camp Muir, this complete Mt. Rainier itinerary and honest Paradise Inn review covers everything you need to know for a late July trip (lodge dining, parking hacks, clockwise vs. counter-clockwise trail routes and more).
I’m regularly active and doing casual local Bay Area hikes, with my biggest prior hike being Nevada Falls in Yosemite a couple years ago—but I’m NOT a super intense mountaineer or extreme athlete. This fitness baseline helps benchmark the difficulty ratings for the Skyline Loop and Camp Muir hikes.
Trip at a Glance
- Duration: 4 Days / 3 Nights (Thursday – Sunday)
- Basecamp: Paradise Inn (Inside the Park)
- Hikes Completed: Skyline Loop Trail (5.5 mi), Snow Lake (2.5 mi), Camp Muir (9 mi), Nisqually Vista (1 mi)
- Key Takeaway: Staying inside the park saves parking stress and allows for early starts, which is crucial for snow conditions on Camp Muir.
- Logistics Tip: Cell service is virtually nonexistent around Paradise; download maps on AllTrails/GPS before driving in. No day-use permits are required for Skyline or Camp Muir (only for overnight stays). Fill water bladders at the Inn or Visitor Center before departing.
This trip is 100% recommended. The scenery is breathtaking, and staying at Paradise Inn is worth it for the trailhead convenience. It makes for an unforgettable mountain getaway
Day 1: Driving from Seattle Airport & Paradise Inn Mt. Rainier Review
We caught a 10:15 AM flight out of San Francisco (SFO) to Seattle (SEA), landed around 12:30 PM, picked up our rental car, and made the scenic drive down to Mount Rainier National Park.
By the time we reached the park around 5:30 PM, the entrance line was nonexistent—largely because a blanket of extremely dense fog had rolled in. It was so thick you couldn’t even see the Visitor Center or the mountain itself when driving up!
Fortunately, we nabbed a parking spot right near Paradise Inn. We booked a stay inside the park, which turned out to be a great decision.
Paradise Inn Rooms & Shared Bathroom Review – What to Expect
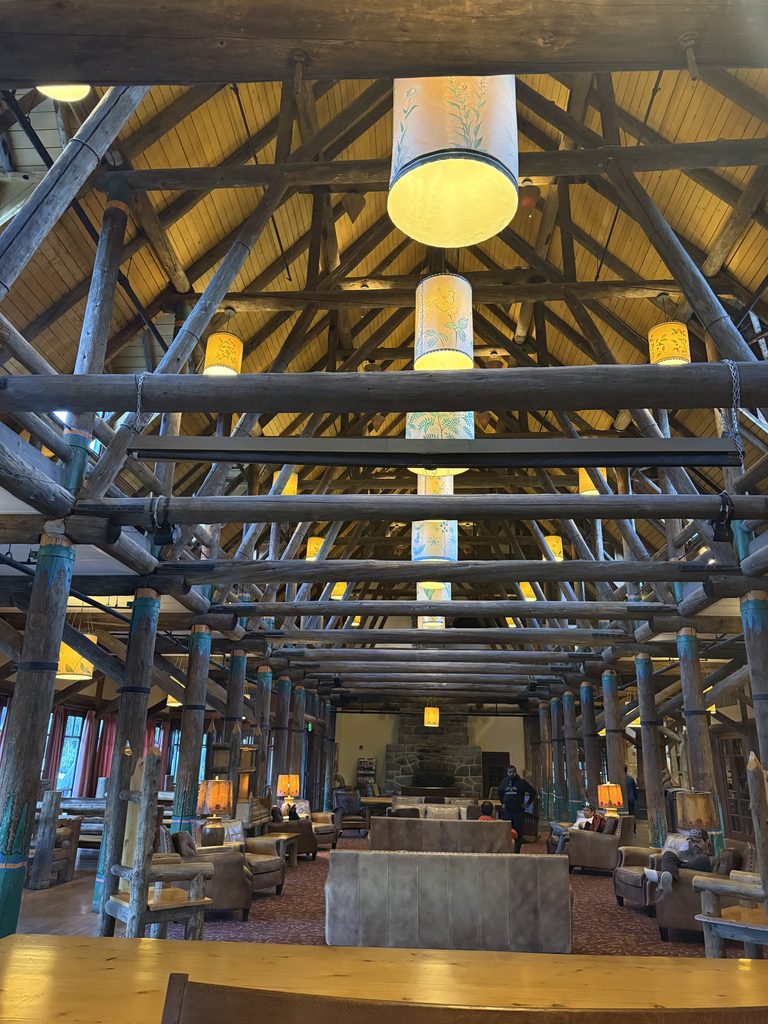
The lodge itself is very cozy, featuring massive timber beams, an upstairs sitting area and a live pianist playing in the evening, and a cafe that opens at 6:00 AM for coffee and breakfast sandwiches (important because there are no coffee makers in individual rooms).
If you’re researching room options, Paradise Inn has two main setups: rooms with private bathrooms (which sell out fast, as in a year in advance) and historic main lodge rooms with shared bathrooms. Rates typically range from ~$200 to $330/night for shared-bath rooms up to ~$380 to $460+/night for private bath rooms and suites.
We stayed in the shared bathroom section. Here’s what it was actually like:
- Room Setup: Compact room with a full bed, dresser, an in-room sink and a mirror.
- Wifi: There is none! I was also worried we would have no cell service, but that wasn’t the case in the hotel. Cell service was strong.
- Shared Showers: 4 individual shower rooms down the hall on our wing (single shower stall behind a fully closing door, not dorm-style multi-stalls). We found them clean and never had to wait, even with a full hotel. The hotel provides robes, slippers, and towels in your room. Pro Tip: Definitely bring flip-flops / shower shoes!
- Restrooms: Central women’s bathroom with 2 stalls. It was generally clean, though they did run out of toilet paper once.
- The upstairs restrooms are also accessible to general public visitors during the day. Walking down the hallway in a bathrobe at 3:00 PM means you might pass day-hikers walking up the stairs. It felt like being back in college—funny and nostalgic, but good to know in advance! Next time, we’d opt for a private bathroom, but the shared setup is perfectly fine.
- The upstairs restrooms are also accessible to general public visitors during the day. Walking down the hallway in a bathrobe at 3:00 PM means you might pass day-hikers walking up the stairs. It felt like being back in college—funny and nostalgic, but good to know in advance! Next time, we’d opt for a private bathroom, but the shared setup is perfectly fine.
Paradise Inn Dining Room: Menu, Prices & Wait Times
We dined here all three nights. On Thursday around 6:00 PM, there was a ~30-minute wait (likely due to the fog), but Friday and Saturday had zero wait. The service was friendly and the food was tasty, though expect national park prices ($$). The comfort-focused menu features bison and elk burgers, meatloaf, mushroom pasta, various starters, and a really good dessert menu.
Day 2: Hiking Skyline Trail Loop & Snow Lake
Skyline Trail Mt. Rainier: Clockwise Route, Distance & Stats
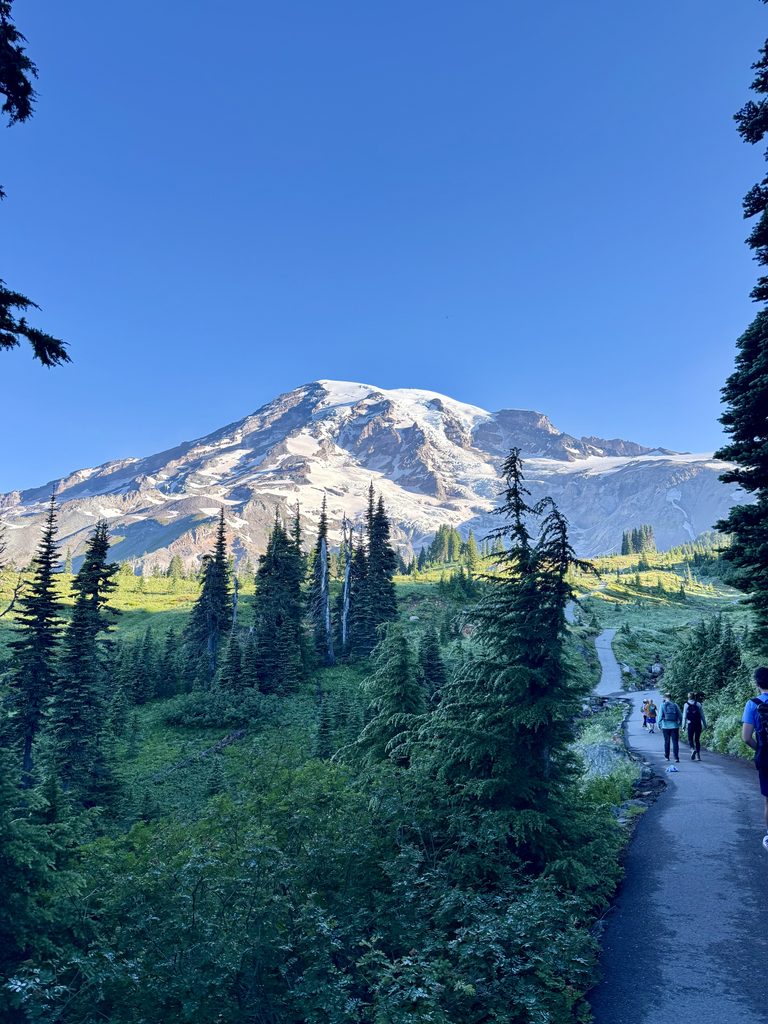
We woke up at ~6:00 AM, had coffee & breakfast downstairs, and walked right out the front door onto the Skyline Trail by 7:15 AM. During our late July trip (July 23–26), the main walking path was completely clear of snow.
- Distance: 5.5 miles loop (Moderate on All Trails)
- Time: ~2.5 hours
- Our Route: Clockwise
Why Clockwise Worked for Us: After researching both directions, we chose the clockwise route. This hits a very steep, paved incline immediately out of the gate. Coming down at the end involves stepping down over rocky steps and uneven terrain. For being used to San Francisco hills, we preferred powering up the smooth paved incline first and taking the rocky steps on the descent. Counter-clockwise offers a more gradual climb but requires going up over those uneven stairs.
The trail is moderate in difficulty. Being used to SF hills and high altitudes from Tahoe trips, we didn’t struggle with the elevation. We wore hiking boots, but trail sneakers with good tread would suffice. Even with a 7:15 AM, the trail was very busy—at times we were walking single-file. For true solitude, you’d need to start before 6:00 AM.
We didn’t find this hike particularly strenuous, although All Trails labels this hike as ‘hard’. Yes there is steep incline to start (I guess when I say “to start”, you are going up some sort of incline for ~1/2 miles at least, just super steep for the first 1/2 mile), but if you’re regularly active it’s manageable.
We saw several marmots along the trek (SO cute) and many chipmunks, who are clearly used to humans and just want your food. The views were stunning along the way.
Also note – each morning before we started our hike, we could there was a very long line at the bathroom outside the visitor center (which doesn’t open until 9am & has more bathrooms). So if you’re driving in, I’d plan for additional time to wait in line before you will actually get on the trail.
Afternoon: Snow Lake Hike
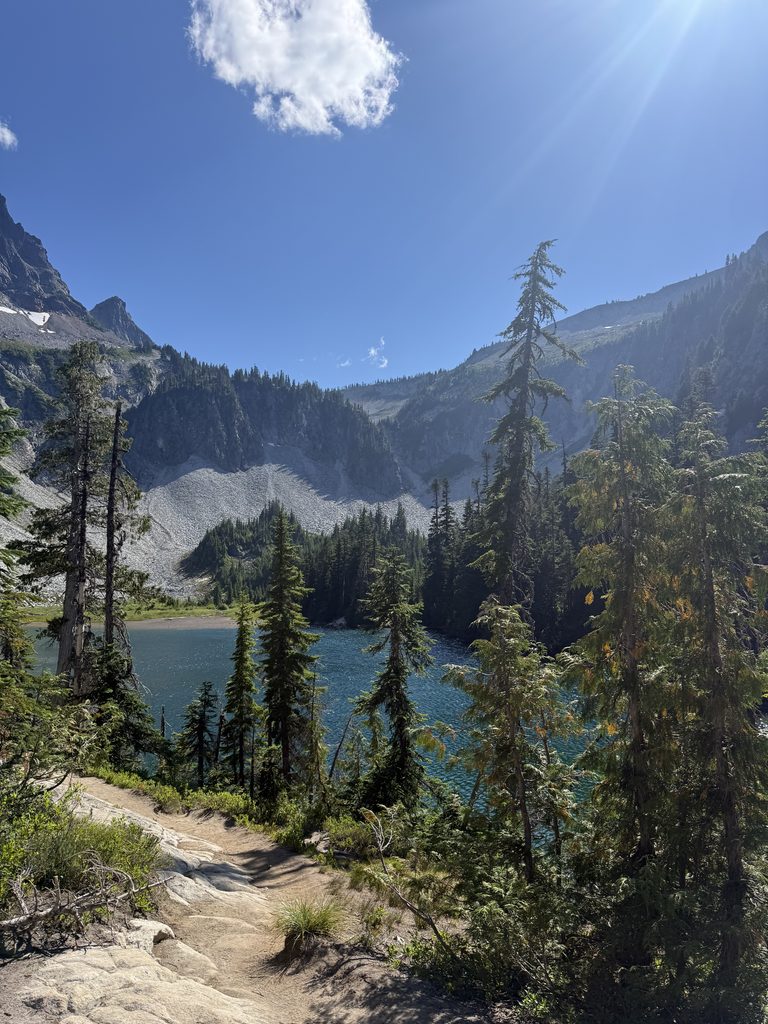
After resting at the lodge midday, we drove 10–15 minutes down the road at ~3:30 PM to hike Snow Lake.
- Distance: ~2.5 miles round-trip (out-and-back)
- Time: Just over 1 hour
- Vibe: Super peaceful! We passed fewer than 10 people total. A couple people were jumping into the water for a swim, making it a great, relaxed contrast to the busy morning on Skyline.
Parking Note: Roadside parking at Snow Lake was easy at 3:30 PM. However, when we returned to Paradise Inn around 5:00 PM, the parking lot was packed and we had to circle several times to find a spot.
Day 3: Camp Muir Day Hike Guide (10,188 ft Elevation)
We didn’t come to Mount Rainier planning to climb to Camp Muir. My husband researched it Friday afternoon, and we decided to go for it on Saturday morning. This 9-mile round-trip hike took us a total of 6.5 hours.
Camp Muir Day Hike Gear & Outfit List (What to Wear)
Since we hadn’t planned for a glacier snowfield trek, our packed gear was minimal:
- What I Wore: Lululemon leggings, running tank, North Face fleece, and high-top hiking boots.
- On Friday evening, we bought hiking poles at the Paradise Visitor Center. This was the best decision we made – without poles, navigating the snowfield would have been so tough – I think we likely would have decided to turn around.
- We brought no gloves, which was a mistake! We packed extra socks in our backpack for the hike back down when our feet would get wet, which ended up saving our hands later.
Navigating Muir Snowfield: Elevation, Trekking Poles
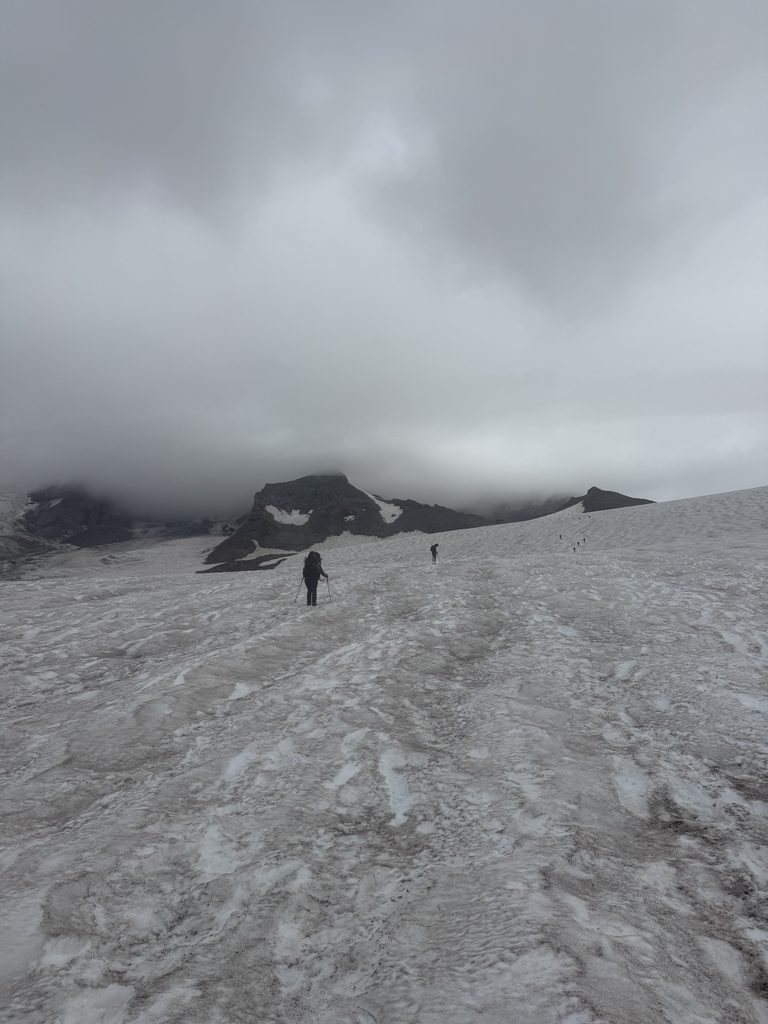
We hit the trail at 7:00 AM. The first ~2 miles overlap with the Skyline Trail before veering off toward Pebble Creek and the Muir Snowfield (~8:00 AM).
- The Ascent: The snowfield is a long, slow-going endurance test. Staring down at your feet to place each step means you encounter several “false summits” thinking you’re almost there.
- Freezing Temps: Starting around 50°F at Paradise, the temperature dropped significantly as wind picked up toward 10,000 ft. With no gloves, our hands grew painfully cold. We pulled our extra socks over our hands like makeshift mittens just to finish the climb!
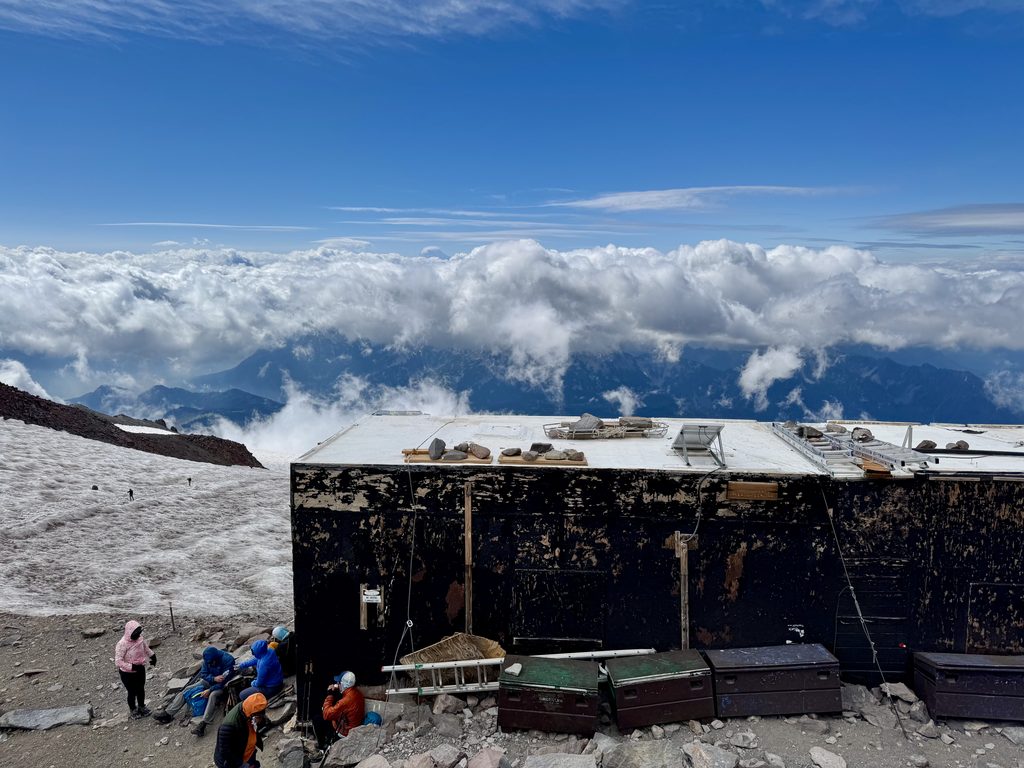
- At the Summit (10,188 ft): The wind and dust were so intense we only stayed 10 minutes for a quick snack before heading down. If it had been nicer, I would have liked to enjoy the view for longer, but I was already cold and knew we had a long trek back down the snow ahead of us.
This hike is noted as strenuous on All Trails. It certainly is in terms of determination needed to get to the top. Personally, I think Nevada Falls in Yosemite (rated as ‘Hard’) was more difficult upon reflection, I didn’t find myself particularly of breath on hurting on this hike – the most distracting thing was actually how cold my hands were.
Tip: Morning Snow Firmness vs. Afternoon Slush
Starting early at 7:00 AM isn’t just about avoiding crowds (the snowfield is wide open, so crowd bottlenecks aren’t an issue). It’s about snow conditions.
In the morning, the snow is firm and compact, making it easier to get traction going up. By the time we starting descending (~11:00 AM), the midday sun had transformed the snowfield into slippery slush. Hiking up in afternoon slush would be exponentially harder and far more slippery (you’d need crampons for sure, which we did not have).
Day 4 (Sunday): Nisqually Vista & Departure
On our final morning, we took a chill ~1-mile stroll along the paved Nisqually Vista Trail near Paradise Inn before checking out. We saw a couple deer grazing and there are some view points of the waterfall & glacier.
As we drove out of the park around ~11:30 AM, we looked back and saw a line of cars waiting at the entrance gate with a 30-minute backup sign.
As we pulled out of our parking spot, a driver was waiting for our spot, then a man appeared and stood in the empty spot trying to hold it… The waiting driver actually got out and physically pushed him away to park. It was a wild reminder of how chaotic Paradise parking gets if you aren’t staying at the lodge!